Understanding the Importance of Camera Mounts
Why Secure Camera Mounting Matters
When considering home security enhancements, camera mounts are often overlooked but play a critical role in achieving optimal performance from your Ring cameras. Without the right mounting accessories, even the most advanced security cameras cannot fulfill their potential. A well-selected and properly installed mount ensures you receive a wide field of view, maintains camera stability, and increases the longevity of your device.
The security cameras market offers a vast array of mounts designed for different purposes, such as wall mounts, pole mounts, or junction boxes. Each type provides unique features and benefits tailored to specific needs and surroundings. Additionally, choosing the appropriate camera mount impacts the overall aesthetic and functionality of your home security setup.
Pricing varies based on the material, design, and installation complexity. From original mounts to more adaptable mount adapters, consumers can find various options across different price and quality ranges. Understanding these aspects can make a difference in securing your investment effectively.
For a detailed understanding of how accessories like mounts can elevate your photography or security setup, explore this comprehensive guide to enhance your equipment experience.
Types of Camera Mounts for Ring Cameras
Various Mounting Options for a Versatile Setup
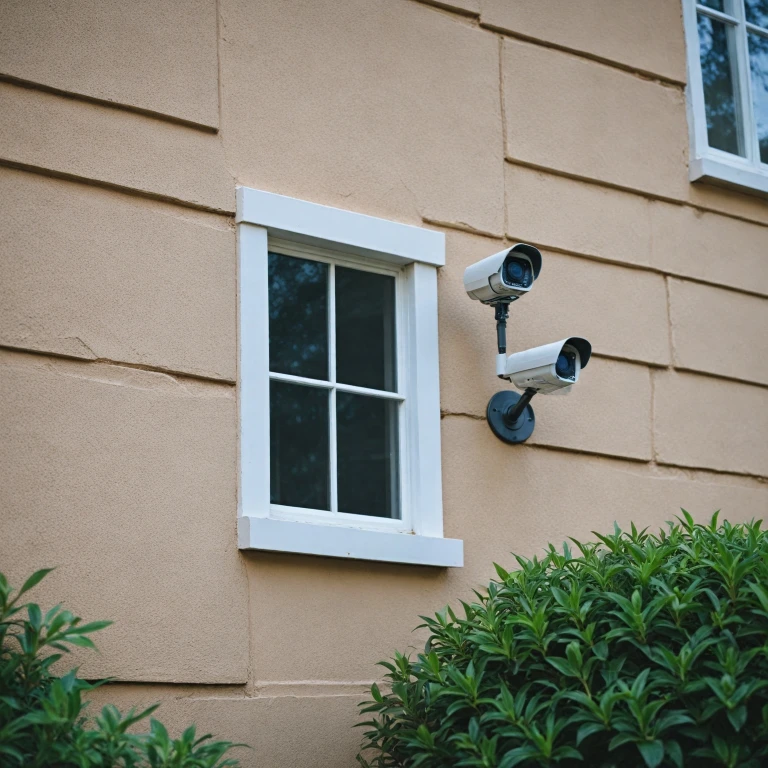
When deciding on the perfect mount for your Ring camera, the staggering variety can provide flexibility but can also lead to confusion. Here's a look at the types of camera mounts available to deliver a stable, effective, and aesthetically pleasing installation. One popular option is the traditional wall mount. It securely affixes your camera to a wall, allowing wide coverage of the desired area. These mounts support easy adjustments for optimal viewing angles. A pole mount serves effectively outdoors, attaching to poles to provide a high vantage point similar to street cameras. Pole mounts can add a unique perspective to monitor larger areas. Dome mounts, often utilized in commercial settings, can also adapt to home security systems. The fixed dome provides a clear, stable view, while the PTZ dome (pan-tilt-zoom) offers flexibility by enabling movement and zooming capabilities. These are increasingly popular for their dynamic surveillance abilities. Mounts designed to work with additional accessories offer added versatility. Use a mount adapter when you need to attach cameras to more complex or non-traditional surfaces. An adapter can assist in connecting various mounting brackets to unique structures. Moreover, a junction box can neatly house cables and connections, reducing clutter and improving weather resistance. While purchasing options vary, price points are often reflective of the mount's material, brand, and versatility features. Prices range from basic units available at a price sale to more advanced solutions, reflecting changes in regular price. To simplify your experience, reviewing the full details of each product can guide a discerning choice. Opting for the right camera mount not only affects stability but can also enhance your camera's performance. For a deeper insight into optimizing your Ring camera, consider exploring the options for essential accessories that enhance functionality and ease of use.Choosing the Right Mount for Your Needs
Finding the Perfect Ring Camera Accessory
Choosing the right mount for your security cameras involves considering several factors to ensure your home remains secure while matching your aesthetic preferences and budget. Whether you're aiming for a fixed dome or a more versatile PTZ dome camera setup, having the appropriate camera mount is crucial.
First, assess the location where your camera will be installed. A sturdy wall mount is ideal for outdoor security cameras, providing a reliable and strong hold. If your situation requires an elevated perspective, such as in a driveway or yard, a pole mount might suit your needs. These mounts offer flexibility in height and angle, ensuring optimum video coverage.
Consider the price when selecting a mount, as it can vary widely. Various options are available at different regular and sale prices, each catering to specific needs. Checking for sales or discounted prices may present an opportunity to purchase a mount at a lower unit price.
Ensure that the mount is compatible with the camera's sku and specs. This includes verifying that any necessary adapters or junction boxes are included in the purchase or available separately. It might also be beneficial to opt for mounts that match the color of your camera—such as a white mount, ideal for blending into lighter-colored walls.
It's crucial to pay attention to the camera mount's technical specifications, such as its compatibility with the camera's lens or any unique accessories that may be required. This ensures you have a seamless integration with your original purchase, minimizing any unexpected issues post-installation.
Finally, compare various camera mounts and their features by checking quick view options or full details online from trusted retailers. Doing so allows you to make an informed decision, whether you're looking to buy in units, engage in bulk purchases, or simply choose a single unit for personal use.
Installation Tips for Secure Mounting
Steps to Ensure a Secure Installation
Installing camera mounts securely is essential not only for optimal viewing angles but also for protection from tampering or environmental damage. Here’s a step-by-step guide to help you through the installation process:
- Choose the Right Spot: Before drilling any holes, identify potential locations on your wall or pole that offer a broad view of the area you want to monitor. Ensure the mount will not obstruct the camera's lens.
- Use Suitable Accessories: Depending on your camera model and the mount type, you may need specific mount adapters or brackets. Be sure to buy the original accessories for a seamless fit.
- Test for Interference: Avoid areas where wireless signals might be disrupted. This is crucial for maintaining a stable video feed from security cameras.
- Secure the Mount: Once the ideal position is determined, securely fasten the wall mount or pole mount using appropriate hardware. Ensure all screws and fasteners are tightly in place to withstand weight and external forces.
- Check the Angle: After installation, ensure the camera angle provides the intended view. Adjust the mount bracket as necessary to achieve the desired coverage.
- Consider a Junction Box: For a clean and protective installation, especially with dome or ptz dome cameras, using a junction box can conceal and protect wiring.
Following these steps will help secure the position of your camera mount, providing stronger support and longevity. Regularly check your camera mounts to ensure they are in good condition and that they continue to serve your security needs effectively.
Common Challenges and Solutions
Addressing Frequent Installation Obstacles
Dealing with the installation of your camera mount can be a bit of a task, but understanding the common challenges might help simplify the process.- Aligning the View: Ensuring that your camera is aligned properly to capture the desired area can be tricky. Try to use a fixed dome or ptz dome mount adapter for more precise adjustments, allowing for both broader view and targeted monitoring depending on your security needs.
- Supporting Structures: When mounting onto surfaces like a wall or a pole, ensure the structure can support the camera's weight. Use a sturdy mount bracket or wall mount designed for secure attachment, particularly if considering installations on uneven surfaces like rough outdoor walls or poles.
- Securing Wiring: Exposed cables not only look messy but can also pose a security risk. Use junction boxes as an accessory to conceal wires. This not only protects cables from weather conditions but also prevents tampering.
- Weather Conditions: For outdoor cameras, consider the climate conditions of your area. Depending on the climate, some mounts and cameras withstand better against weather elements than others. Investing in high-quality, weatherproof materials can prevent unnecessary replacements and protect your view.
- Correct Tools: Make sure you have the correct tools for the job. A simple wall mount install might need different tools compared to a pole mount. It might be beneficial to purchase an adapter or a specific mount that comes with a complete set of required tools.
- Ensuring Compatibility: Each ring camera model has unique specifications. Always double-check the compatibility of the mount SKU, whether a standard or quick view style, with your specific camera model to avoid mismatches that can cost you both time and money in replacement expenses.
Maintenance and Upkeep of Camera Mounts
Ensuring Longevity and Performance of Your Camera Mounts
Regular maintenance of camera mounts is key to maintaining the quality and security of your video surveillance system. Whether you're dealing with a wall mount, a mount adapter, or a pole mount, regular upkeep can prevent potential issues and help you get the most out of your installation. Here are some tips to keep your setup in optimal condition:- Check and Tighten Mount Brackets: Over time, vibration can loosen mount brackets. Regularly inspect and tighten these components to ensure your cameras remain securely anchored.
- Clean the Lens and Casing: Dust can accumulate quickly, especially in outdoor settings. Use a soft cloth to clean the camera’s lens and casing, avoiding streaks that could obscure the view.
- Inspect for Rust or Corrosion: Particularly relevant for metal mounts, check for signs of rust or corrosion, which could jeopardize the stability of the mount and thus the security of the camera.
- Adjust Camera Angle: Seasonal changes can shift mounting surfaces or foliage coverage affecting the camera view. Periodic adjustments ensure you capture the desired field of view without obstruction.
- Review SKU and Accessories: Keep track of your camera's SKU and regularly audit accessories like the junction box or the quick view full details of each unit. This ensures you're aware of the components' condition and compatibility in case replacements are required.