Understanding Wall Anchors
Getting to Grips with Different Types of Wall Anchors
Understanding wall anchors is crucial when setting up your Ring camera securely. Wall anchors serve as a firm foundation, ensuring that your camera remains affixed, regardless of the installation surface. These devices come in various shapes and sizes, each specifically designed for different wall materials and weight capacities.
Let's break down the types of anchors commonly used:
- Plastic Anchors: Best for securing items in light-duty applications. These are ideal for common household items but may not hold pounds of weight needed for heavier installations.
- Metal Anchors: Durable and perfect for heavy-duty applications. They can withstand significant weight and are more reliable for securing valuable devices like your Ring camera. Metal options include molly bolts and toggle bolts.
- Expansion Anchors: Commonly used in drywall, these drywall anchors expand behind the wall, offering a secure grip. They are simple to install using a drill bit.
- Toggler Snaptoggle: Ideal for hollow wall installations, this toggle bolt offers strong holding power with easy installation.
While selecting the right type, ensure to consider the material of your wall and the weight of the item you’re mounting. This will not only ensure longevity but also enhance security. For a deeper dive into understanding these critical components, you might find this comprehensive guide helpful.
Choosing the Right Wall Anchors for Your Surface
Identifying the Appropriate Anchors for Optimal Support
When it comes to installing your Ring Camera, selecting the correct wall anchors is key to ensuring a firm and lasting installation. The choice of anchors largely depends on the type of surface you are working with, whether it be drywall, wood, or masonry.
For drywall, plastic anchors or drywall anchors are common picks, especially for small to medium-weight items. These anchors expand as the screw is inserted, providing a secure fit. In cases where more support is necessary, toggle bolts or molly bolts are preferred as they can support heavy-duty applications by evenly distributing weight behind the wall.
Plastic anchors are affordable and usually come in an anchors pack. They are simple to use and are suitable for surfaces where the load will be moderate. Meanwhile, metal varieties like molly bolts offer more security; these expansion anchors are perfect for hollow walls. They expand behind the wall surface, thus anchoring the screw more effectively.
For installations where the anchor must hold pounds, such as outdoor installations exposed to varied weather conditions, toggle bolts or togglers snaptoggle are advisable as they provide robust support.
To familiarize yourself with specific surface requirements, it is prudent to research your particular wall material thoroughly. Knowing your wall type will help you choose the most efficient anchor type that will hold bolts firmly without compromising the integrity of your wall.
In the event of difficulty with installation, ensure your choice of anchor is correct. Additionally, check out troubleshooting tips that might address common installation challenges.
Step-by-Step Guide to Installing Wall Anchors
Executing a Flawless Installation With Wall Anchors
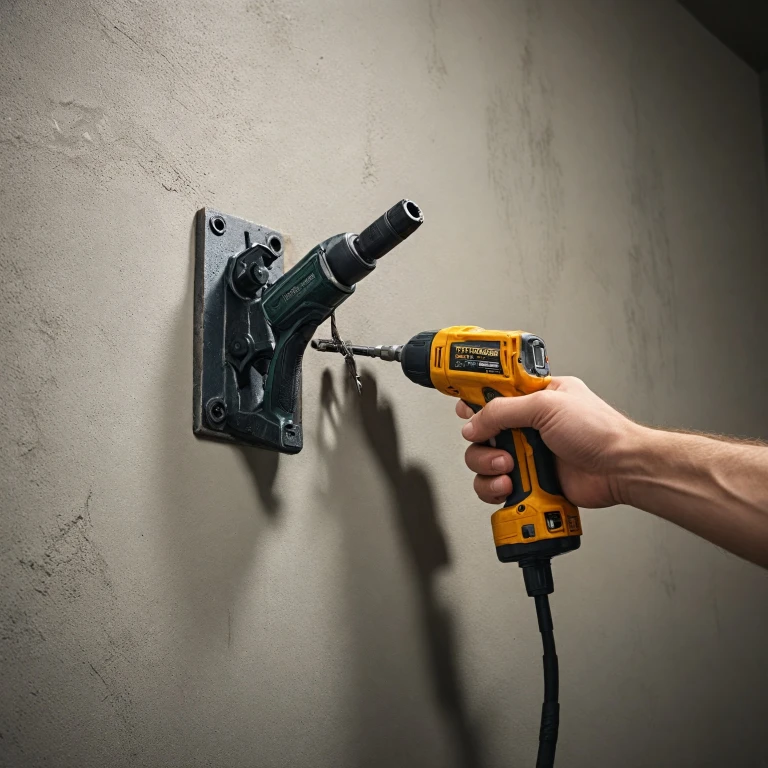
Installing wall anchors for your Ring camera might seem straightforward, but following a structured approach can ensure that your setup stands the test of time, especially when dealing with various wall materials. Start by gathering all necessary items: find a suitable anchor pack tailored to your wall type—drywall, wood, or concrete—and ensure you have the right tools on hand, including a drill and appropriate drill bit. Here's a step-by-step guide:- Mark the Spot: Before drilling, use the base of your Ring camera bracket as a template to mark the spot you plan to install. Ensure the spots are level and will support the camera's view effectively.
- Choose the Right Drill Bit: Select a bit that matches the size of your chosen anchors. For drywall anchors or plastic anchors, a smaller bit that matches the main body of the anchor without the flares is ideal.
- Drill the Hole: With the drill bit mounted, drill into the marked spots. For hollow walls, you might want to use a pilot hole first, preventing any accidental large drilling.
- Insert the Anchor: Tap the drywall anchor or plastic anchor into the hole for a snug fit. For more substantial needs, consider using molly bolts or toggle bolts as they're designed to expand behind the wall, providing a stronger hold for heavier items.
- Secure the Anchor Screws: Once the anchor is firmly in place, insert the screws that came with your anchor pack and tighten them securely. This will ensure that your installation can hold the intended weight without pulling out.
- Attach the Camera: Finally, mount your Ring camera onto the bracket using the necessary screws or bolts that came with your device.
Common Mistakes to Avoid When Using Wall Anchors
Preventing Errors with Wall Anchors
When installing your Ring camera with wall anchors, certain mistakes can compromise the effectiveness of your setup. Understanding these potential pitfalls can save you time and ensure the security of your installation. Here are some common errors to avoid:
- Choosing the Wrong Type of Anchor: Selecting the appropriate anchor for your specific wall surface is critical. If using drywall, consider drywall anchors or toggle bolts. For heavier loads, metal molly bolts might be necessary.
- Inadequate Drilling: Make sure to use a drill bit that matches the diameter required by your chosen anchor type. This prevents the anchor from being either too loose or damaging the wall when forced in.
- Improper Use of Anchors: Each anchor type, whether it’s a plastic anchor or an expansion anchor, has a specific installation method. Misuse can lead to reduced hold strength.
- Underestimating Weight Capacity: Always check the weight capacity of the anchors. For instance, some drywall anchors are rated to hold only a few pounds, while others are designed for heavy-duty use.
- Skipping the Pilot Hole: Drilling a pilot hole before inserting an anchor is often necessary, especially in hollow walls. This initial step is critical to ensure the anchor's stability.
Avoiding these common mistakes not only preserves wall integrity but also enhances the safety and functionality of your Ring camera setup.
Troubleshooting Installation Issues
Tackling Common Problems with Setting Up Wall Fasteners
Encountering issues while setting up your Ring camera with wall anchors can be a hassle. However, understanding what might go wrong and how to rectify it can save you a lot of time and effort. Here are some common installation problems and how to troubleshoot them:- Loose Anchors in Drywall: If you find that your drywall anchors feel loose after installation, it could be due to an oversized hole. Ensure that the drill bit you use is the correct size for the anchor. Using a bit that is too large will create a bigger hole, weakening the grip of plastic anchors.
- Anchor Not Holding Weight: If the anchor fails to support the weight of your Ring camera, you might be using the wrong type of anchor. For heavy-duty installations, toggle bolts or molly bolts might be more suitable as they provide better support in hollow walls. Check the weight limit of your anchors as not all are designed to hold heavy items.
- Difficulty in Screwing Into Anchor: If you're having trouble driving the screw into the anchor, it might be due to a hard material anchor or incorrect alignment. Ensure the anchor is properly seated in the wall and the screw is correctly aligned. Some metal anchors require more force, so an electric drill may help.
- Anchor Spinning in Wall: This occurs when the anchor isn't gripping inside the wall. For expansion anchors, ensure they are expanded fully. If using a plastic anchor that spins, consider using a toggle bolt or a molly bolt which expand behind the wall to provide a secure hold.
- Wall Damage During Installation: If you're noticing damage while installing the anchors, this could be due to applying too much pressure or using an inappropriate drill bit. Ensure you're using a bit suited for your wall type and drill gently to avoid unnecessary holes or cracks.
Enhancing Security with Proper Installation
Boosting Security with Effective Installation
When installing your Ring Camera, getting the process right from the start can significantly enhance the security of your home. Here's how you can ensure your camera is optimally set up through effective installation practices:- Choosing Quality Materials: Always opt for robust wall anchors that suit your specific wall type. Whether mounting on drywall or concrete, using effective anchors — such as metal or heavy-duty plastic anchors — is crucial. High-quality anchors will provide a reliable hold, keeping your camera firm in its place.
- Proper Use of Hardware: Use the correct combination of screws, bolts, and toggle bolts to secure your camera. For hollow walls, toggle bolts are particularly effective, while for solid surfaces, expansion anchors or molly bolts may offer better stability.
- Correct Anchor Installation: Ensuring that your wall anchors are correctly installed can prevent issues like sagging or detachment. Drilling the right-sized hole and firmly securing your chosen anchors helps in maintaining a solid grip.
- Regular Maintenance Checks: Periodically check your setup for any signs of wear or loosening. Re-tighten screws and replace any damaged anchors that may have lost their hold over time.
- Maximize Weight Capacity: Confirm that the selected anchors can hold the weight of the camera and any additional items if attached. Drywall anchors or molly bolts often specify the pounds they can hold, guiding your choice effectively.