Why ring camera angle mistakes ruin good hardware
Most ring camera angle mistakes start with a perfect looking preview. The live view in the Ring app shows a crisp video, your front door is centered, and the device seems ready, yet the first real incident exposes every installation error in one painful clip. You bought a capable camera, but the wrong mounting design and lazy motion settings quietly turn it into a decorative gadget.
Think about how many Ring devices sit high on a wall, tilted vaguely toward the driveway. The screws provided are tight, the mounting plate is level, and the security screw is locked, but the motion detection zones are aimed at empty pavement while visitors walk just outside the cone. When you add more Ring doorbells or a second Ring camera without a plan, you often multiply blind spots instead of security.
For a smart home enthusiast running several Ring doorbells, a video doorbell at the front door, and a floodlight camera over the garage, angle is the real operating system. The app, the motion alerts, and the clever automation options only work if the lens geometry matches how people actually move around your property. Multi camera security is not about more devices, it is about fewer installation mistakes and fewer wrong assumptions about what the Ring video can see at night.
The lawn stare: when open space kills motion detection
The first of the classic Ring camera angle mistakes is the lawn stare. You mount a Ring device above the front door, point the camera straight across the yard, and the live view looks cinematic, but the motion alerts stay silent when someone hugs the wall. The video doorbell sees a beautiful rectangle of grass while the person at your doorstep is cropped to a shoulder and a shoe.
Ring video doorbells like the Ring Video Doorbell 4 or Ring Battery Doorbell Plus use PIR (passive infrared) sensors that care about movement across the frame, not straight toward it. When the main motion vector is depth instead of sideways, the motion detection zones in the Ring app struggle, especially once night vision kicks in and contrast drops beyond about 7 to 8 metres. You end up loading clip after clip where cars on the street trigger motion alerts while the parcel drop at the threshold never registers.
The fix is to add a slight sideways bias using a corner kit or a wedge, so the camera sees people crossing its field rather than marching directly at it. A simple 15 degree corner kit on a Ring doorbell can turn a useless lawn stare into a reliable security view that tracks a visitor from the gate to the mat. Before tightening every screw, stand where a stranger would stand, open live view, and adjust the mounting plate until your whole body moves across the frame, not just into a shrinking dot of perspective.
For multi camera setups, avoid pointing two Ring devices down the same long corridor of grass or driveway. Instead, stagger angles so one camera covers the approach while another covers the side step toward a window or side door. This way, your Ring video clips tell a continuous story instead of repeating the same distant silhouette from three slightly different heights.
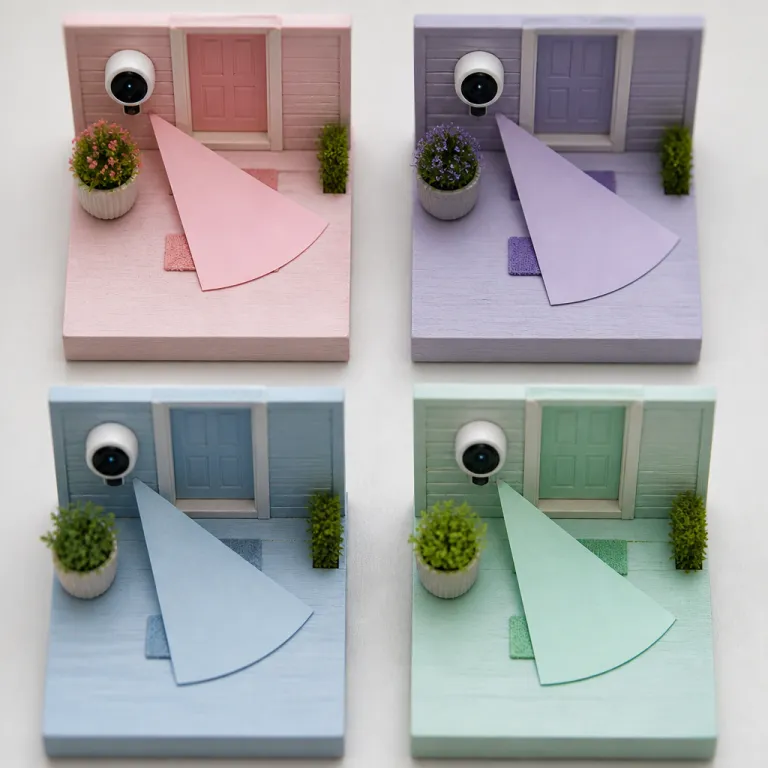
Planning this coverage is where a structured multi camera strategy helps more than another impulse purchase. A practical way to map these angles before installing anything is to sketch your property and mark every likely path, then match each path to one primary camera instead of letting several devices fight over the same lawn. For a simple visual check, imagine a top down diagram where each camera owns a coloured wedge of movement, with no two wedges stacked directly on top of each other.
The sky slice: mounting too high and aiming at clouds
The second big category of Ring camera angle mistakes is the sky slice. You install a Ring camera or a wired video doorbell under the eaves at 3 metres, angle it slightly down, and the preview looks wide and impressive, but faces shrink to unhelpful blobs. The device technically records every visitor, yet the Ring video is useless when you pause on the frame where you hoped to read a logo or see a face.
Ring’s own installation guides for many doorbells and cameras recommend mounting around 1.2 to 1.4 metres for doorbells and roughly 2.4 metres for wall mounted cameras, because the motion detection hardware expects a certain geometry between the lens and a human torso. When you push higher, especially with a floodlight cam or a Stick Up Cam on a gable, the motion settings in the Ring app cannot compensate for the steep angle, and night vision exaggerates the problem by blowing out the ground while leaving faces in shadow. You see a bright halo of pavement, a hat brim, and not much else.
Renters often feel forced into this error because they cannot drill into brick at eye level, so they default to the soffit and call it done. If you are in that situation, use a no drill mounting plate or a removable adhesive mount lower on the wall, then add a small tilt so the camera sees from chest to head at about 4 to 6 metres away. The screws provided with these plates are not just hardware, they are your only chance to lock in a geometry that respects how the sensor was designed.
For multi camera properties, resist the temptation to put every Ring device at the same high line under the roof. A better pattern is one high overview camera for context and one lower angle camera for identification at each critical zone, such as the front door or a side gate. This pairing lets the overview camera watch for motion while the lower camera captures faces, licence plates, and package labels.
If you want a deeper explanation of why a 2.7 metre mount can see a person at 9 metres while a 3.5 metre mount misses faces at 5 metres, picture a simple side view sketch: draw a triangle from the lens to a person’s head and feet at different distances, then note how the steeper angle hides facial detail under caps and hoods. The short version is simple, though. Your security screw should lock in a view of people, not rooftops and clouds.
The mirror twin and the window bounce: wasted overlap and ruined night vision
The third trap in Ring camera angle mistakes is the mirror twin. You add a second Ring device to cover a blind spot, mount it opposite the first, and end up with two cameras staring down the same vector, each sending motion alerts for the same passing car. The wall space is full, the app dashboard looks impressive, but your actual security coverage has barely improved.
Mirror twin setups are common with Ring doorbells and Stick Up Cams on narrow town house porches. One camera sits by the front door, another on the opposite wall, and both record the same slice of path while leaving the side window or the gate completely unmonitored. Instead of doubling coverage, you double notifications and halve the useful information in each Ring video clip.
To fix this, rotate one camera so its primary motion detection zone covers a different approach, such as the path from the driveway or the step from the side alley. Use the motion settings in the Ring app to narrow overlapping zones, so only one device owns each slice of movement. When you add a third or fourth Ring camera, think in terms of complementary angles, not symmetrical ones, and sketch a quick overhead diagram showing each camera’s cone of coverage before you drill.
The fourth classic error is the window bounce, where a Ring camera or video doorbell sits behind glass for convenience. During the day, the live view looks fine, but once night vision activates, the infrared light reflects off the window and fogs the entire image. You see a bright white bloom and almost no detail beyond the glass.
This is one of the most frustrating installation mistakes, because it feels clever and non invasive until the first night time incident. The only real fix is to move the device outside the glass, using a proper mounting plate, a corner kit, or a no drill bracket, and then tighten every screw so the housing sits flush and stable. If you absolutely must shoot through glass, disable night vision in the settings for that Ring camera and add an external light, but accept that this is a compromise, not a best practice.
For smart home enthusiasts running several Ring devices, avoid stacking cameras behind multiple windows along the same wall. Instead, place one outdoor camera to cover the entire façade and let your indoor devices focus on interior motion, where reflections are less destructive. That way, your motion alerts tell you where to look, rather than reminding you that glass always wins against infrared.
The walk away at night test: validating every angle in ten minutes
Most Ring camera angle mistakes survive because people only test during the day. The app loads quickly, the video looks sharp, and the default motion settings seem fine, so the security screw goes in and the job feels finished. Real life does not happen in that controlled moment, it happens when you are tired, it is dark, and the battery is at 23 percent.
The fastest way to validate any Ring device is the walk away at night test. Wait until after dark, open live view in the Ring app, and walk every path a stranger could take, from the street to the front door, from the side gate to the back patio. Watch the video doorbell feed on another phone or tablet while you move, and note exactly where your body leaves the frame or turns into a silhouette.
Repeat the same walk while watching recorded motion alerts instead of live view. This shows you how the motion detection actually behaves, not just what the sensor could see in theory. If the clip starts when you are already at the mat or ends before you leave the frame, adjust the mounting angle, tweak the motion settings, and run the test again.
For multi camera setups, perform this test with all Ring devices active, one zone at a time. Turn off motion alerts for non critical cameras while you test a specific path, so you can see which device should own that movement and which one should be dialed back. This prevents the mirror twin problem and keeps your notifications meaningful.
Do not forget to test night vision performance specifically. Walk with a hat, a hood, and a parcel in your hands, because these real world details change how the infrared light reflects and how the camera exposes your face. If you cannot recognise yourself at 5 metres in the dark, a stranger will be even harder to identify when it matters.
Once you have a clean set of angles, lock them in by tightening every screw and security screw, then document your motion settings in a note or screenshot. That way, if you ever reset the Ring camera or move the mounting plate, you can rebuild a known good configuration instead of starting from guesswork. Ten minutes of deliberate testing beats ten hours of scrubbing through useless clips after an incident.
Daytime previews, privacy zones, and why night mode matters more
The last piece of the Ring camera angle mistakes puzzle is psychological. Daytime previews in the Ring app are bright, colourful, and flattering, so they trick you into thinking the device is perfectly placed. Night mode is grainy and unforgiving, which is exactly why it deserves more of your attention.
When you first install a Ring doorbell or any Ring camera, spend as much time in night view as you do in daylight. Toggle the app into live view after dark, then adjust the mounting plate and corner kit until faces are clear and motion alerts trigger where you expect. Only then should you worry about framing the perfect daytime shot of your front door or garden.
Smart home enthusiasts often add automation routines based on motion detection, such as turning on porch lights or announcing visitors on an Alexa speaker. These routines are only as good as the underlying angles, so a wrong tilt or a reflective surface can turn your clever design into a constant stream of false triggers. Before building complex options in the Ring app, stabilise the basics with a clean, reflection free night vision image.
Privacy zones and shared spaces add another layer of complexity. If your Ring devices face a shared driveway or hallway, use privacy masking to block neighbours’ doors while still covering your own front door and path. A simple way to plan this is to sketch the shared area, draw your camera’s field of view as a cone, then shade rectangles where you will apply privacy zones so that only your own entrance and walkway remain visible.
Battery powered models introduce one more subtle error. Aggressive motion settings and poor angles cause constant loading and recording, which drains the battery faster and tempts you to blunt the motion alerts until the device is almost passive. A better approach is to refine the angle, narrow the motion zones, and let the hardware work efficiently instead of constantly waking for irrelevant movement.
In the end, the difference between a Ring camera that earns its place and one that becomes a cone of shame is not the megapixel count, but the view from your porch at 2 a.m. When every screw is tightened around a tested angle, your Ring devices stop pretending to watch and start quietly doing their job. That is the standard a serious home security setup should meet, whether you own one video doorbell or a dozen Ring doorbells across a multi camera property.
FAQ
How high should I mount a Ring doorbell or camera for best results ?
For most Ring doorbells and cameras, a mounting height around 2.4 metres above the ground balances field of view and identification. At this height, the motion detection hardware can track movement across the frame while still capturing faces and details like package labels. Going much higher often creates the sky slice problem, where you see lots of ground and very little useful facial information.
Can I install a Ring camera behind a window to avoid drilling into walls ?
You can physically place a Ring camera behind glass, but night vision performance will usually be poor because the infrared light reflects off the window. During the day, the video may look acceptable, yet at night you will often see a bright reflection and almost no detail outside. For reliable security, it is better to use a no drill mounting plate or adhesive bracket to place the device outside the glass.
How do I know if my Ring camera angle is missing important areas ?
The most reliable method is the walk away at night test. Open live view after dark, then walk every path a visitor or intruder might take, watching where you enter and leave the frame and how clear your face appears. If any approach is only partially visible or your face is not recognisable at typical distances, adjust the angle or position and repeat the test.
Do I need multiple Ring cameras to cover a small property effectively ?
Many small homes can be covered well with a single well placed video doorbell and one additional camera, provided the angles are carefully planned. A front doorbell can handle visitors and packages, while a second camera can watch a side gate, driveway, or back patio. Adding more devices without a placement plan often creates mirror twin overlap and extra alerts rather than genuinely better security.
How can I reduce false motion alerts without missing real events ?
Start by correcting obvious angle issues, such as pointing the camera directly at a busy street or a moving tree line, then refine the motion settings in the Ring app. Use narrower motion zones, adjust sensitivity, and disable alerts for areas where movement is constant but irrelevant, like a distant road. Once the physical placement and digital zones match real movement patterns, you will see fewer false alerts and more meaningful notifications.