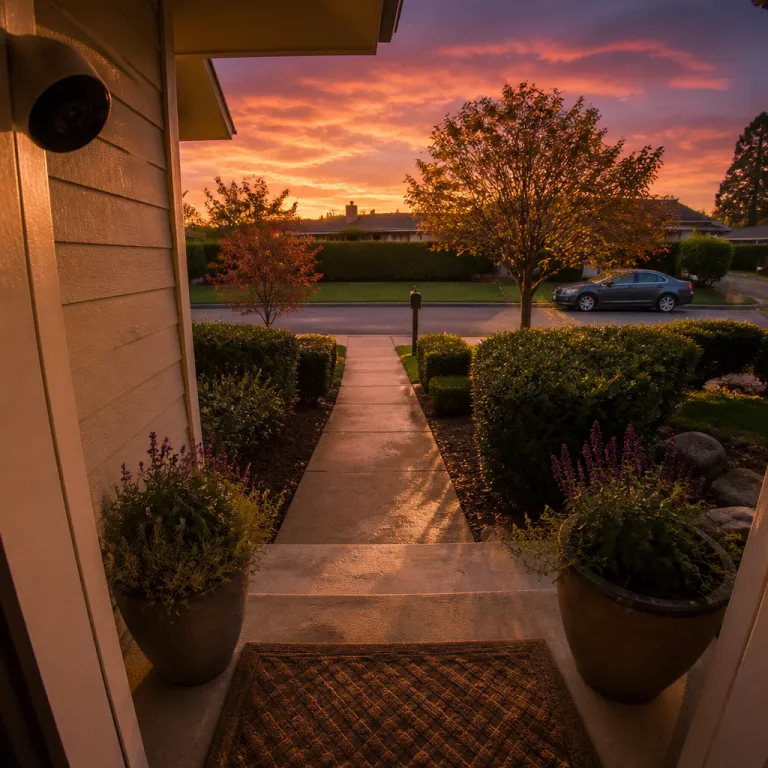
Why ring camera detection zone setup starts with the first 15 feet
Your ring camera detection zone setup should begin with the space between the street and your door. That corridor of 5 to 10 metres (roughly 15 to 30 feet) is where motion detection decisions happen, long before a latch is forced or a window is tested. If your camera only frames the welcome mat, it records the moment of arrival but not the intent that formed on the sidewalk.
Every Ring camera and Ring Video Doorbell uses a passive infrared (PIR) sensor to read heat based motion in front of the device. That sensor does not see like a video cam; it feels temperature changes across stacked motion zones that extend outward in a fan shape. According to Ring’s own support documentation on motion detection, these PIR zones are arranged in horizontal layers that detect motion more reliably when a person moves across them rather than straight toward the device. When you set your motion settings in the Ring app, you are really telling that sensor which zone matters most and how sensitive it should be to a person crossing those invisible beams.
On a cool night, a human body stands out clearly against the background, so motion detection can reach close to the advertised range of about 9 to 10 metres (30 feet) on many Ring doorbells. On a hot afternoon, the same person blends into the ambient heat and the effective motion zone shrinks, which is why your camera motion clips sometimes start late in summer. A smart renter treats that approach corridor as a living system, adjusting motion sensitivity and motion zones as temperatures, shadows and traffic patterns change instead of relying on a single “set and forget” configuration.
How PIR motion, field of view and motion zones really work
The field of view of your camera is everything the video sensor can see, but the motion zone is only where the PIR sensor can reliably trigger recording. That is why you may watch Ring video clips where someone appears in the frame without any earlier motion alerts, because they stepped into the picture but not through the active detection zone. For a budget conscious renter, understanding this split between what is visible and what actually triggers recording is the cheapest upgrade you can make to your home security.
When you open the Ring app on your phone and tap motion settings, you are not just toggling a few sliders. You are telling the device which zones to arm, how far the motion detection should reach and when smart alerts should filter out less important events. In practice, that means you can set a near zone to ignore pets on the porch while a farther motion zone watches the shared walkway where strangers first appear, giving you more useful early warnings.
On battery powered models like Ring Video Doorbell 4 or Battery Doorbell Plus, aggressive motion settings drain the battery faster because every trigger wakes the device and starts a video recording. Ring’s help pages note that frequent motion events can cut battery life from several months down to a few weeks in busy locations. Wired models such as Ring Video Doorbell Pro 2 and Floodlight Cam can afford more generous motion zones, but they still rely on the same PIR physics described in Ring device manuals. If you want a deeper technical dive into how thermal sensing shapes camera motion performance, a guide on how cam thermal technology enhances Ring camera security explains why ambient heat can be your biggest blind spot.
Mounting angles that own the approach, not just the threshold
Most renters instinctively mount a Ring doorbell straight at the door, but that angle only captures faces at arm's length. A smarter ring camera detection zone setup tilts the device to own the approach, framing the 3 to 6 metre (10 to 20 foot) path where people actually walk. You want the PIR beams to run across that path, not straight down it, so that motion cuts through multiple zones and triggers early.
On a standard Ring Video Doorbell, use the included wedge kit or a third party bracket to angle the camera slightly toward the sidewalk or corridor. That small change lets the PIR sensor see people crossing the beams instead of walking directly toward the device, which often produces weaker motion detection. For renters in apartment blocks, mounting the camera on the door frame and pointing it along the hallway rather than directly outward usually gives better motion alerts and longer approach footage.
Outdoor cams like Stick Up Cam Battery or Spotlight Cam Pro benefit from being mounted 2 to 2.5 metres (6.5 to 8 feet) high and angled down at about 30 degrees. This height keeps the camera motion zones focused on human torsos instead of car headlights or tree tops, which reduces false alerts. If you care about night vision performance across that approach corridor, a specialist overview of top security cameras with infrared night vision shows how infrared range and beam spread interact with your chosen mounting point.
Dialling in motion settings, smart alerts and Bird's Eye View
Once the hardware is mounted, the real work of ring camera detection zone setup happens inside the Ring app. On the home screen, tap the menu icon (three lines) in the top left corner, select Devices, then choose your specific camera or video doorbell from the list. From there, tap Motion Settings and you will see options for motion zones, motion sensitivity and smart alerts that shape how the device behaves.
Draw your motion zones so they hug the walkway or stairwell where people approach, not the entire car park or street beyond. A narrow motion zone that covers 5 to 8 metres of approach will usually outperform a wide one that reaches the road, because it avoids constant alerts from passing vehicles. For renters with shared hallways, carve the zone so it covers your door and the immediate corridor but stops short of neighbours' doors to avoid unnecessary notifications and respect their privacy.
On newer models like Ring Video Doorbell Pro 2 and some Ring cam devices, Bird's Eye View uses radar to map where motion started and ended. Ring’s support pages explain that this feature combines radar with the camera view to draw a top down path of the motion event. That view can show whether someone lingered at the gate or walked straight to your door, which is invaluable context when you review Ring video clips. To enable it, open the Ring app, tap the three dots next to the device name, select Settings, go to Motion Settings > Advanced Motion Detection, choose your Bird's Eye options and then tap Save. A simple mental screenshot is to imagine a satellite style mini map overlaid on your live view, with a line tracing the visitor’s route.
Night, weather and battery: living with your zones over time
Detection zones that work perfectly on a cool evening can misbehave on a bright, hot afternoon. As temperatures climb, the difference between body heat and background heat shrinks, so the PIR sensor sees weaker motion and the effective zone contracts. That is why you might notice that your camera motion clips start closer to the door in summer than in winter, even though you never changed a single setting.
Rain, fog and wind also shape how motion detection feels in daily use, especially for battery powered devices. Blowing branches at the edge of a wide motion zone can generate constant alerts, which drains the battery and trains you to ignore notifications. The fix is simple but often skipped, because you need to revisit the Ring app, open Ring, adjust motion sensitivity downward and redraw the zones so they exclude the noisiest parts of the scene, such as tree lines or busy pavements.
For renters who travel often, pairing tuned motion settings with smart alerts and a vacation ready profile is essential. A practical guide to Ring vacation mode and forgotten settings shows how to balance security with notification fatigue while you are away. In the end, the most secure ring camera detection zone setup is not the one with the widest coverage, but the one that reliably captures the first step onto your property and still leaves you willing to read every alert at 2 a.m., because what matters is not the megapixel count, but the view from your porch at 2 a.m.
FAQ
How far should my Ring camera motion zone extend from the door?
For most homes and apartments, a motion zone that reaches 5 to 8 metres from the door is ideal. That range usually covers the key approach corridor without including the public street or distant car park. If you see frequent alerts from traffic, shorten the zone slightly and raise the motion sensitivity only if you start missing people who walk directly toward your entrance.
Why does my Ring camera record people only when they reach the mat?
If clips start when someone is already at the threshold, your motion zones are probably too close to the door or aimed straight ahead. Adjust the mounting angle so the camera looks along the approach path and redraw the zones to cover that corridor. Increasing motion sensitivity one step can also help, but avoid maxing it out unless you have very little background activity and can tolerate more alerts.
Do higher motion sensitivity settings drain the battery faster?
Yes, higher motion sensitivity on a battery powered Ring device usually means more frequent triggers and shorter battery life. Each motion event wakes the camera, starts a video recording and often sends an alert, all of which consume power. To balance security and battery life, start with medium sensitivity, then adjust in small steps while watching how many extra alerts you receive and how quickly the battery percentage drops.
What is the difference between smart alerts and motion zones?
Motion zones define where the camera is allowed to trigger, while smart alerts decide which of those triggers are important enough to notify you about. Zones are about geography, but smart alerts are about filtering people, animals or other motion types. Using both together lets you cover the full approach while still keeping your phone quiet when only a cat, passing car or blowing shrub moves through the frame.
Should I point my Ring doorbell at the street for better coverage?
Pointing a Ring doorbell directly at the street usually creates more noise than value, especially in busy areas. You will capture cars, pedestrians and shadows that have nothing to do with your front door, which leads to constant alerts and faster battery drain. Aim the camera so it owns the last 5 to 10 metres of approach to your door instead, because that is where decisions are made and where footage is most useful when you review motion events later.